[wpdreams_ajaxsearchlite]
NavMesh Pathfinding
New Atavism 2018.2 comes with support for fully featured NavMesh.
新的Atavism 2018.2支持全功能的NavMesh。
- 为了使用它,你必须得到最好的Unity side graph baker A * Pathfinding Project Pro,它可以在你的apanel中使用并导入到你的项目中。
- 然后,您应该打开要为其烘焙图形的场景
- 在场景中创建一个空的游戏对象。
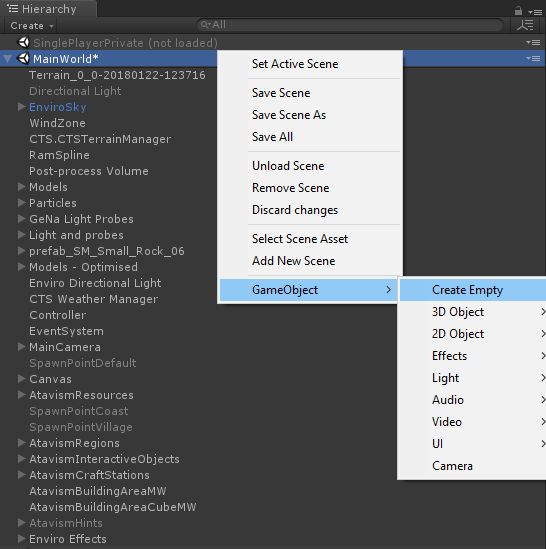
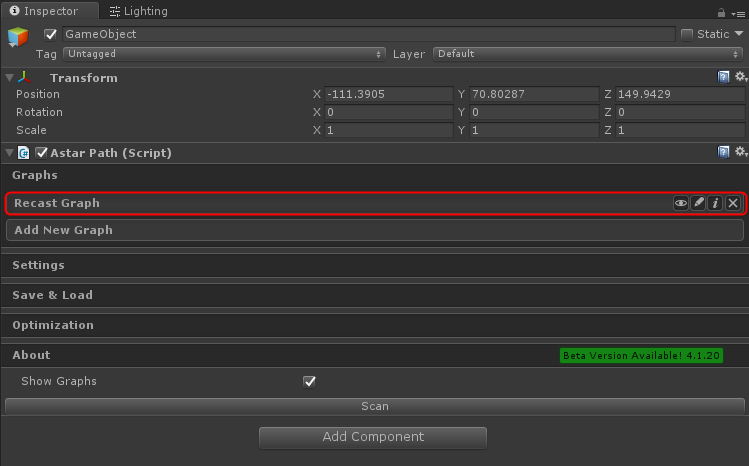
4.添加Pathfinder组件

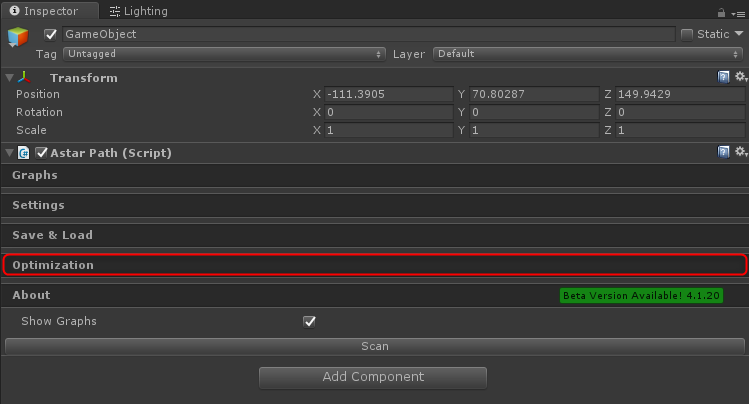
- Expand Optimization tab
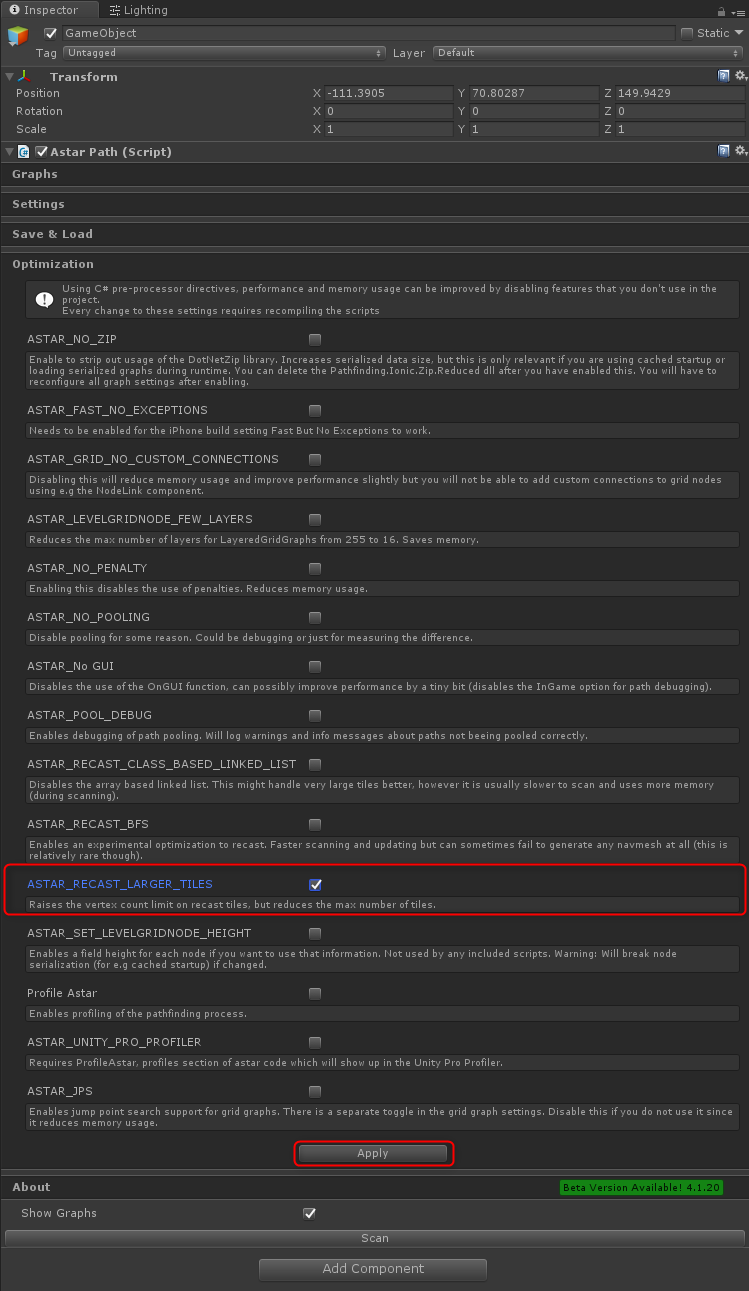
- Tick the ASTAR_RECAST_LARGER_TILES option and click Apply button
- 展开优化选项卡
- 勾选ASTAR_RECAST_LARGER_TILES选项,然后单击“应用”按钮
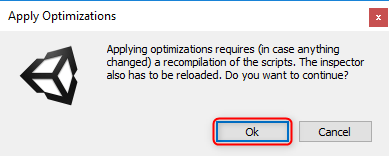
- Click Ok button on the newly opened dialog box
- 单击新打开的对话框上的“确定”按钮
- Expand Graphs tab and click Recast Graph option within Add New Graph
- 展开Graphs选项卡,然后单击Add New Graph中的Recast Graph选项

- Expand Recast Graph by clicking on it
- 单击展开重新生成图形
- You have to set Use Tiles to Dont Use Tiles option, as we are using 32bit mesh
- 你必须设置Use Tiles to Dont Use Tiles选项,因为我们使用32bit网格
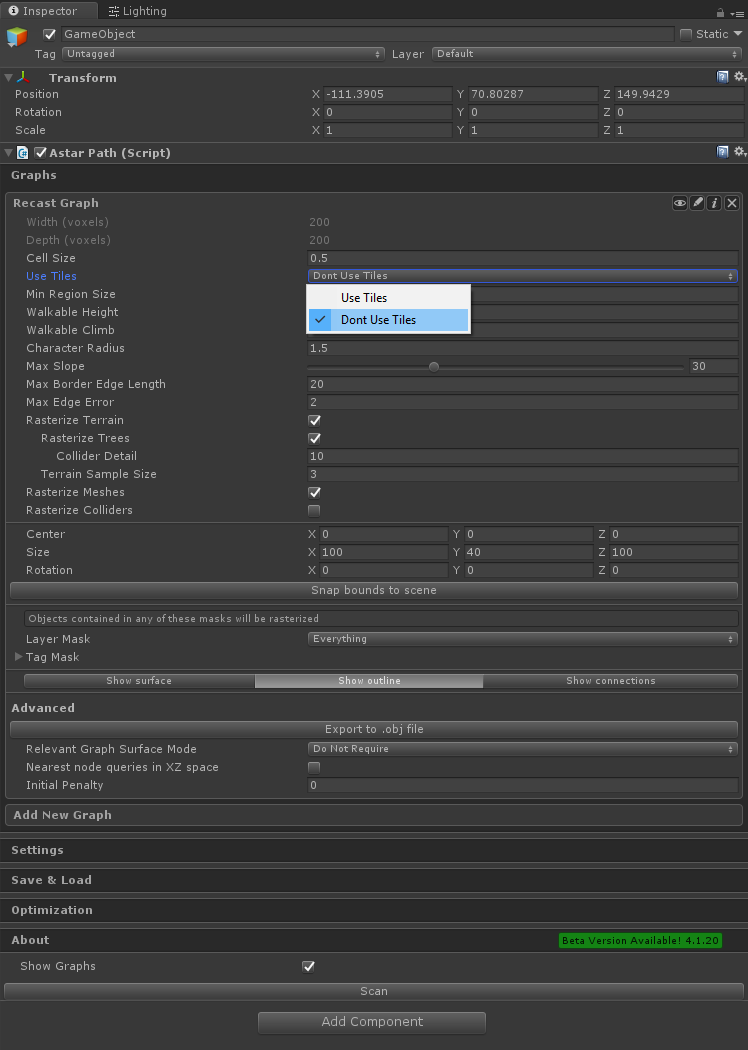
- Rest of the options are depending on your use case, but for example for the MainWorld map which is delivered within Atavism package, parameters which worked best for us are
- 其余的选项取决于您的使用案例,但是例如在Atavism包中提供的MainWorld地图,最适合我们的参数是

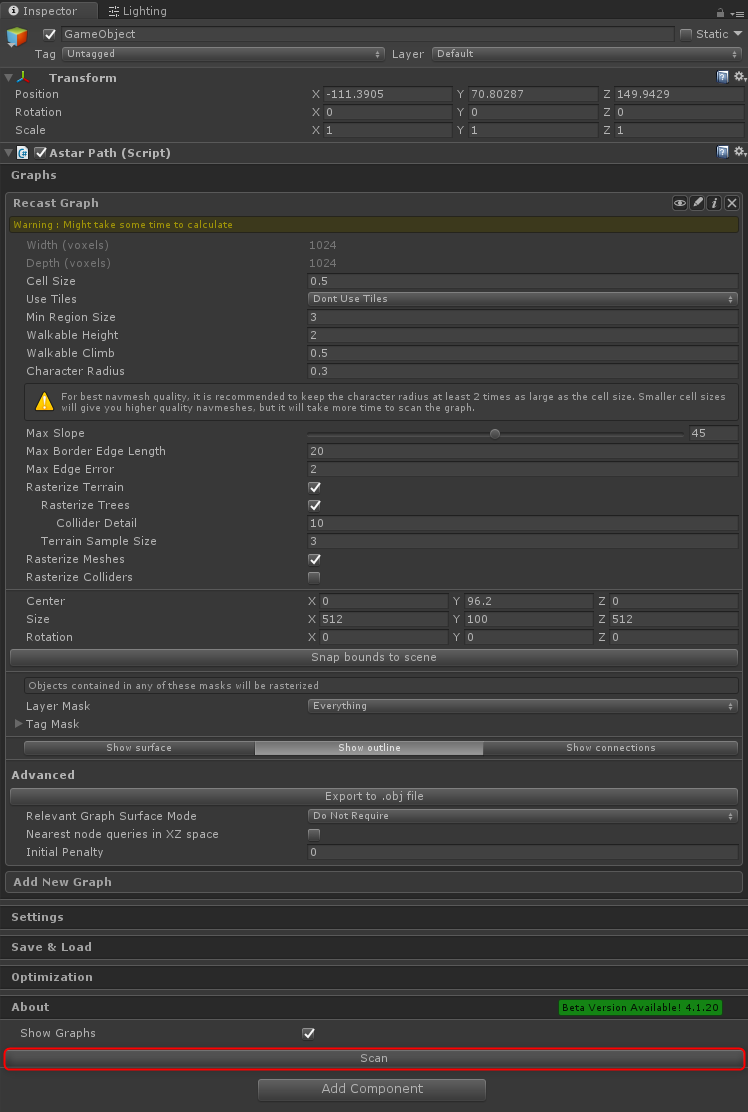
- Click Scan button
- 单击扫描按钮
- The progress bar should be presented
-
应该显示进度条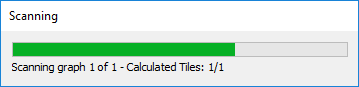

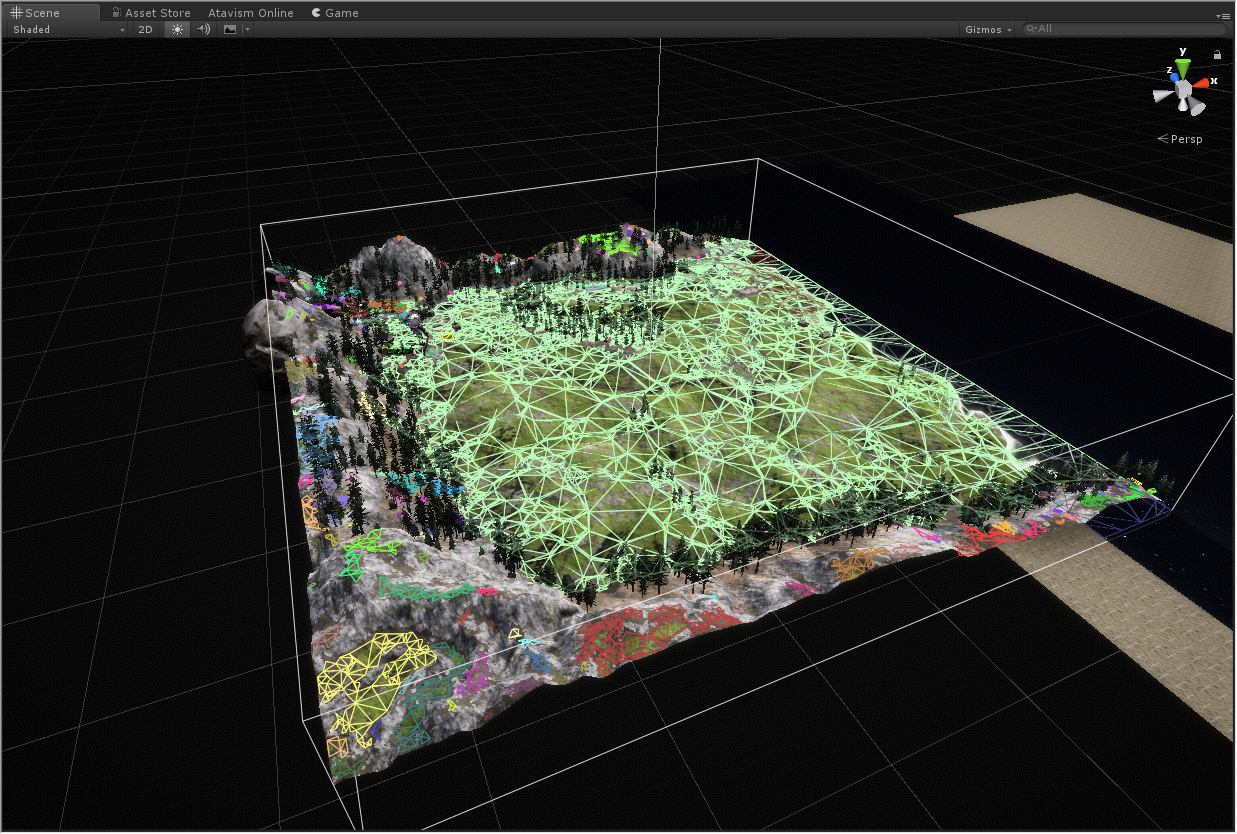
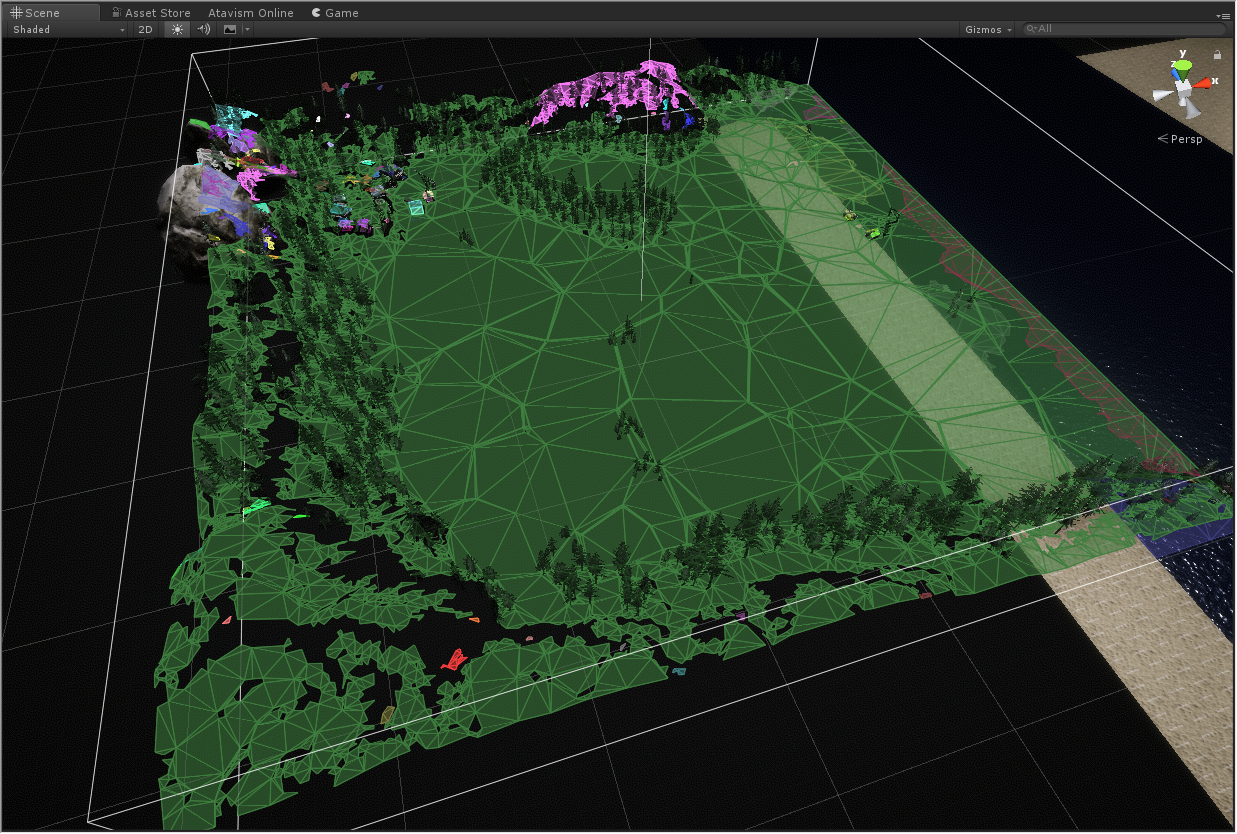
- You can visualize it by changing options Show surface or Show outline with Show Graphs checkbox ticked
- 您可以通过更改选项“显示曲面”或“使用显示图形显示轮廓”复选框来对其进行可视化
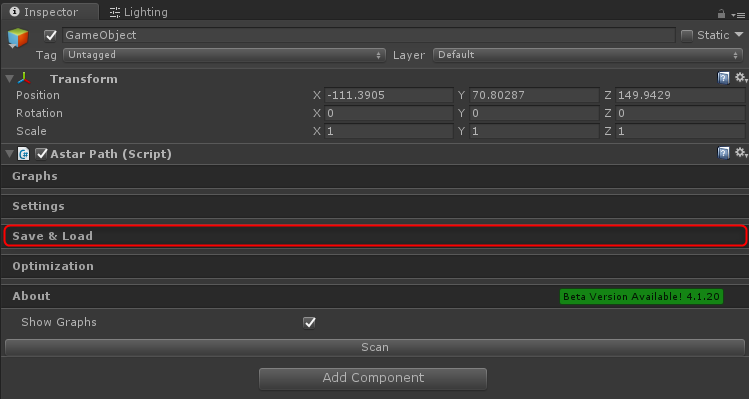
- Click Save & Load tab
- 单击保存并加载选项卡
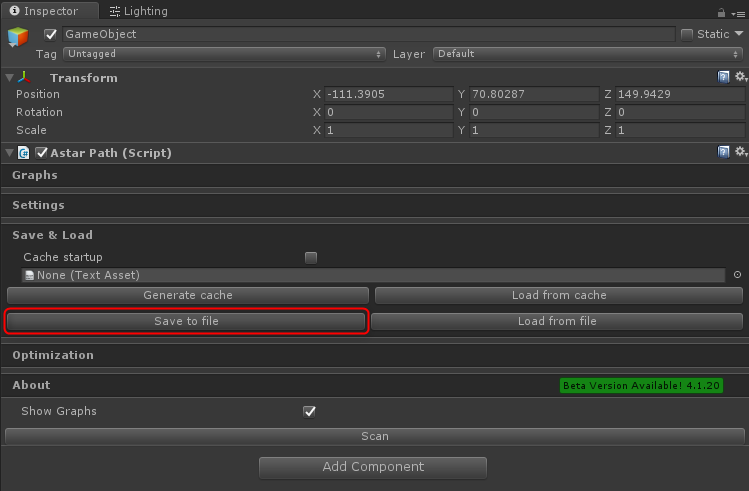
- Click Save to file button
- 单击“保存到文件”按钮
- Select directory where you want to save it. The most important part is that name of the file must be corresponding to the Atavism instance name, for example, if you are preparing NavMesh Graph for MainWorld Instance then the file should be named as MainWorld.bytes. and click save
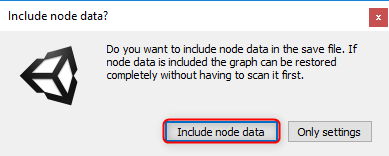
- In the dialog box click Include node data button
- 选择要保存的目录。最重要的部分是文件的名称必须与Atavism实例名称相对应,例如,如果您准备NavMesh Graph for MainWorld Instance,则该文件应命名为MainWorld.bytes。然后单击“保存”
- 在对话框中单击“包括节点数据”按钮
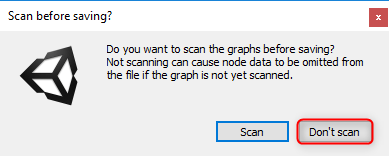
- In the dialog box click Don’t scan button
- 在对话框中单击“不扫描”按钮
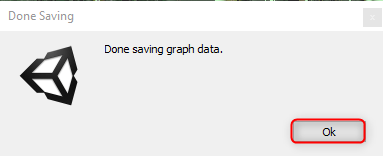
- In the dialog box click Ok button
- 在对话框中单击“确定”按钮
- Then on the server side in the directory atavism_server/navmesh/ create the new directory with Atavism Instance Name (in our case it will be MainWorld). It’s important to keep the upper and lower case corresponding with the Instance name in the Atavism Editor.
- Copy newly created graph to that created directory on the server
- Restart Atavism World Server
- 然后在目录atavism_server / navmesh /的服务器端创建带有Atavism实例名称的新目录(在我们的例子中它将是MainWorld)。在Atavism编辑器中保持大小写与实例名称相对应很重要。
- 将新创建的图形复制到服务器上创建的目录
- 重新启动Atavism World Server
Important Note: Your server requirements may be varied if you are using NvMesh as each NavMesh Graph will require additional memory, and 1GB of the minimum required memory may be not sufficient if you are going to use NavMesh functionality.
重要说明:如果您使用NvMesh,您的服务器要求可能会有所不同,因为每个NavMesh Graph都需要额外的内存,如果您要使用NavMesh功能,则1GB的最小所需内存可能不足。