NavMesh Pathfinding
Atavism 10.4.0+
New Atavism 2018.2 comes with support for fully featured NavMesh.
- In order to use it, you have to get the best Unity side graph baker A* Pathfinding Project Pro, which is available in your apanel, and import it into your project.
- Then you should open the scene for which you want to bake the graph
- Create an empty game object in the scene.
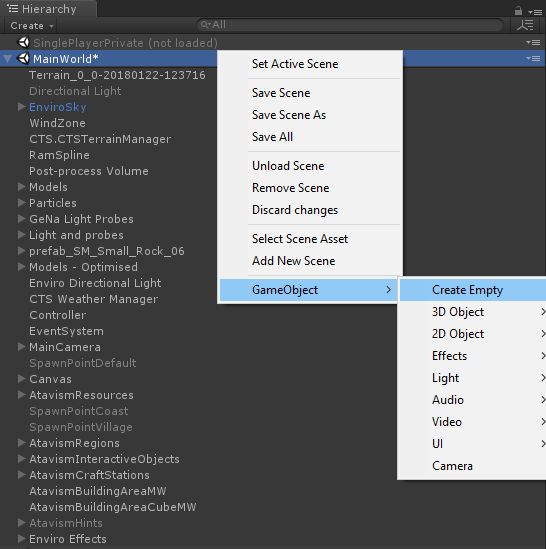
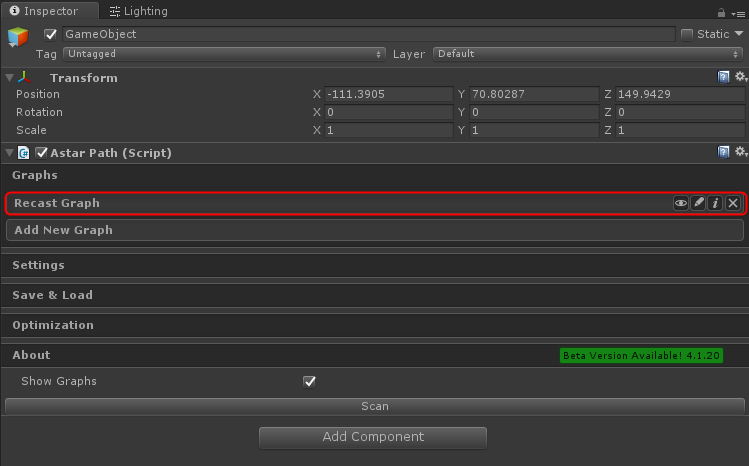
- Add Pathfinder component to it

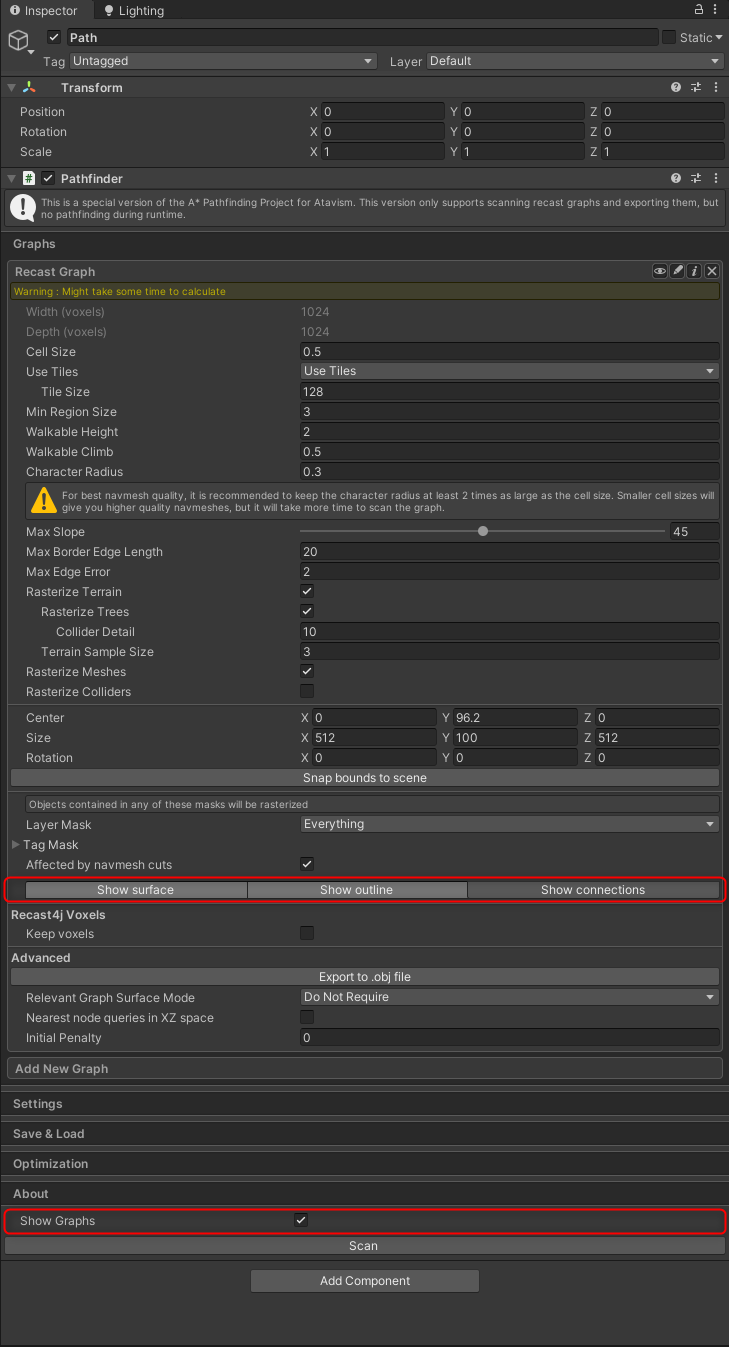
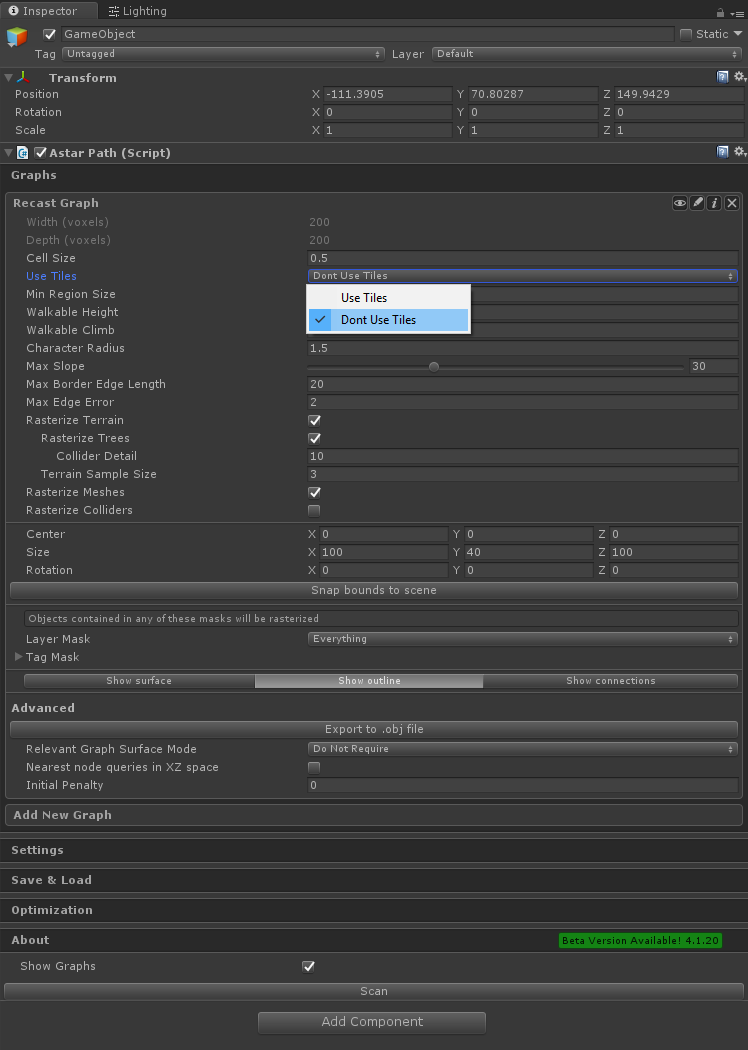
- Expand Graphs tab and click Recast Graph option within Add New Graph

- Expand Recast Graph by clicking on it
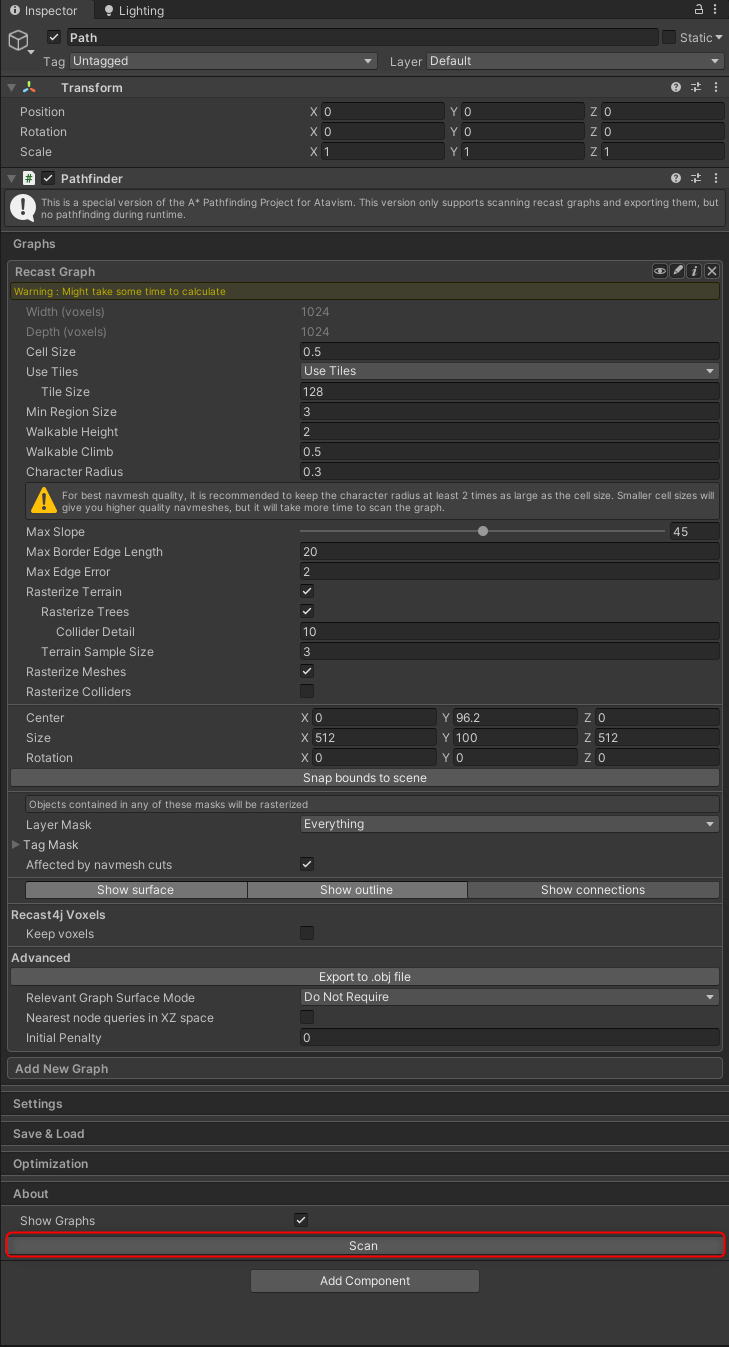
- The rest of the options are depending on your use case, but for example for the MainWorld map which is delivered within the Atavism package, parameters that worked best for us are

- Defines radius of your mobs and NPCs based on which navmesh will calculate if your character will fit some entrance, door, etc.
- Defines slope on which your mobs and NPCs will be able to walk
- Defines map size area
- If you are going to use dynamic navmesh then tick the Keep voxels option. Dynamic navmesh is useful if you will use world builder and you will want that mobs would use dynamically built buildings. Here you can find a video presenting these elements
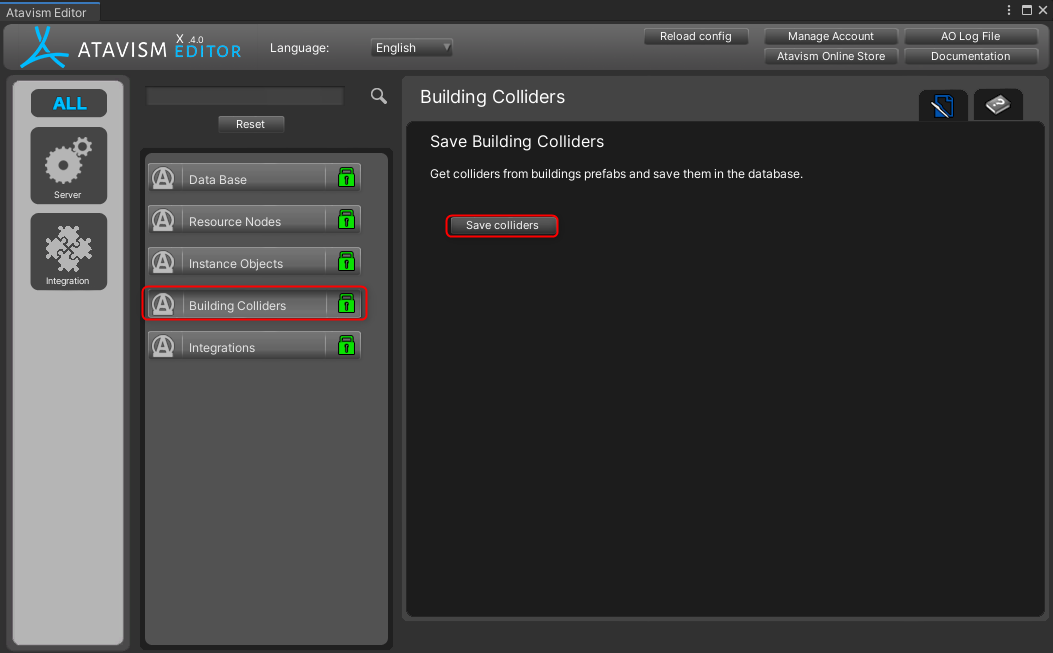
For dynamic navmesh you have to use primitive colliders. Right now supported are boxes, spheres, and capsules. To save them you have to open Atavism Editor inside Unity and select Building Colliders and then click the Save colliders button that will analyze all prefabs assigned in the Building Objects and save colliders in the database for them
- With Atavism 10.4.0 we added the option, so you could use tiles, which speeds up navmesh generation and lets you build it for much bigger maps and more precise
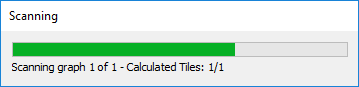
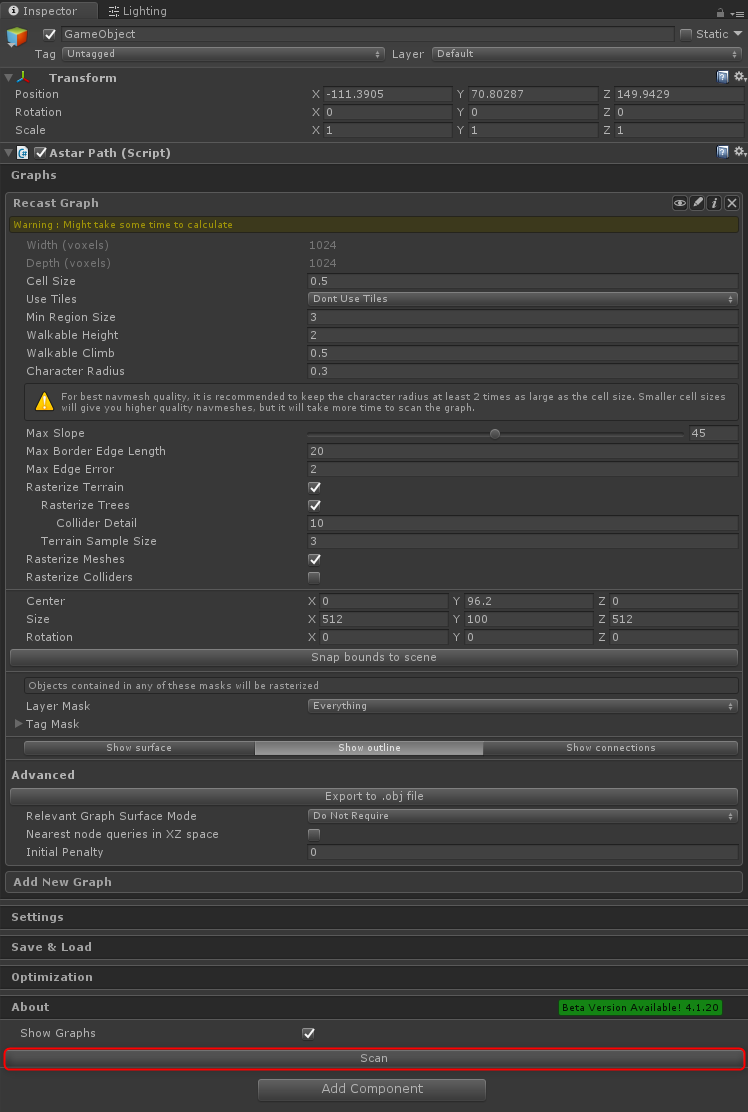
- Click Scan button
-
The progress bar should be presented
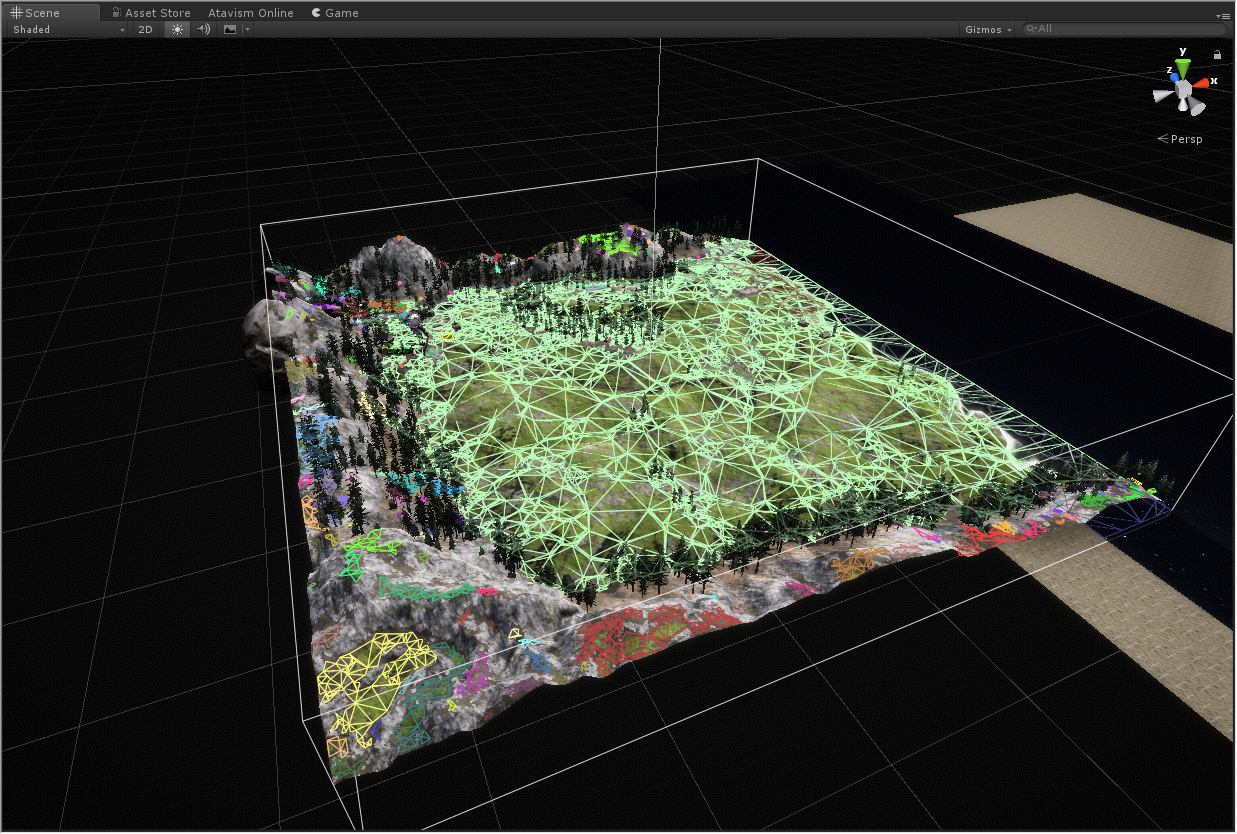
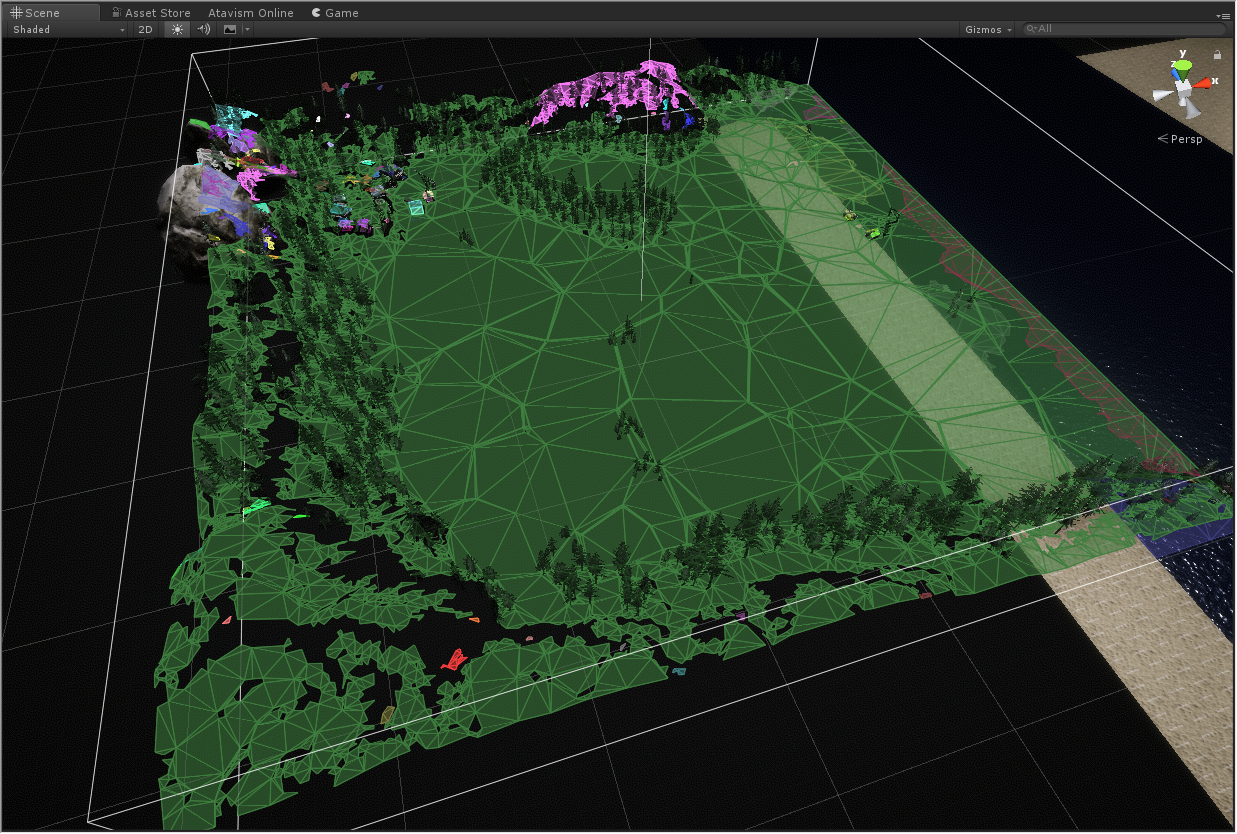
- You can visualize it by changing options Show surface or Show outline with Show Graphs checkbox ticked
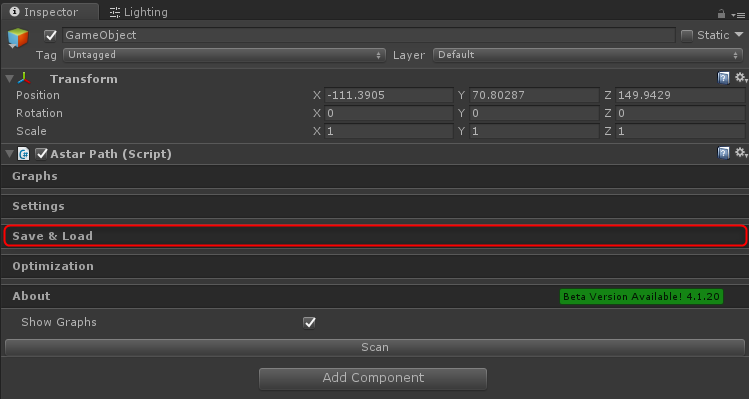
- Click Save & Load tab
-
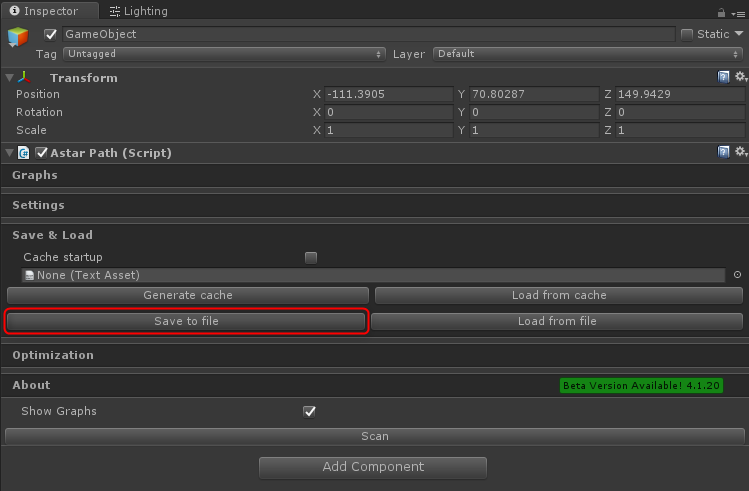
Click Save to file button
-
Select the directory where you want to save it. The most important part is that name of the file must be corresponding to the Atavism instance name, for example, if you are preparing NavMesh Graph for MainWorld Instance then the file should be named as MainWorld.bytes. and click save
-
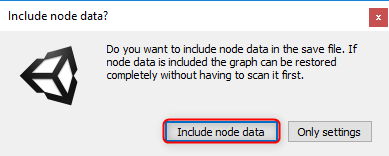
In the dialog box click the Include node data button
-
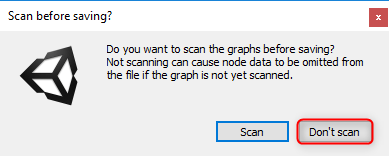
In the dialog, box click the Don’t scan button
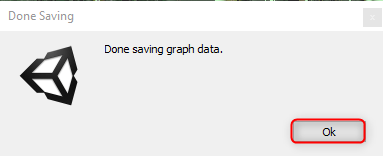
- In the dialog box click the Ok button
- Then on the server-side in the directory atavism_server/navmesh/ create the new directory with Atavism Instance Name (in our case it will be MainWorld). It’s important to keep the upper and lower case corresponding with the Instance name in the Atavism Editor.
- Copy newly created graph to that created directory on the server
- Restart Atavism World Server
Important Note: Your server requirements may be varied if you are using NvMesh as each NavMesh Graph will require additional memory, and 1GB of the minimum required memory may be not sufficient if you are going to use NavMesh functionality.
Atavism 10.3.0-
New Atavism 2018.2 comes with support for fully featured NavMesh.
- In order to use it, you have to get the best Unity side graph baker A* Pathfinding Project Pro, which is available in your apanel, and import it into your project.
- Then you should open the scene for which you want to bake the graph
- Create an empty game object in the scene.
- Add Pathfinder component to it
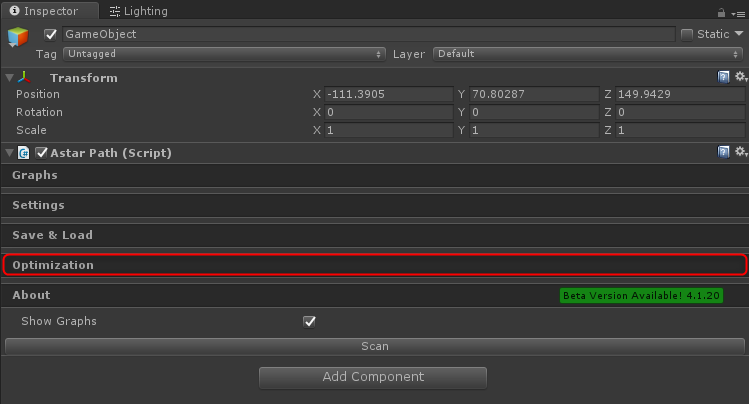
- Expand Optimization tab
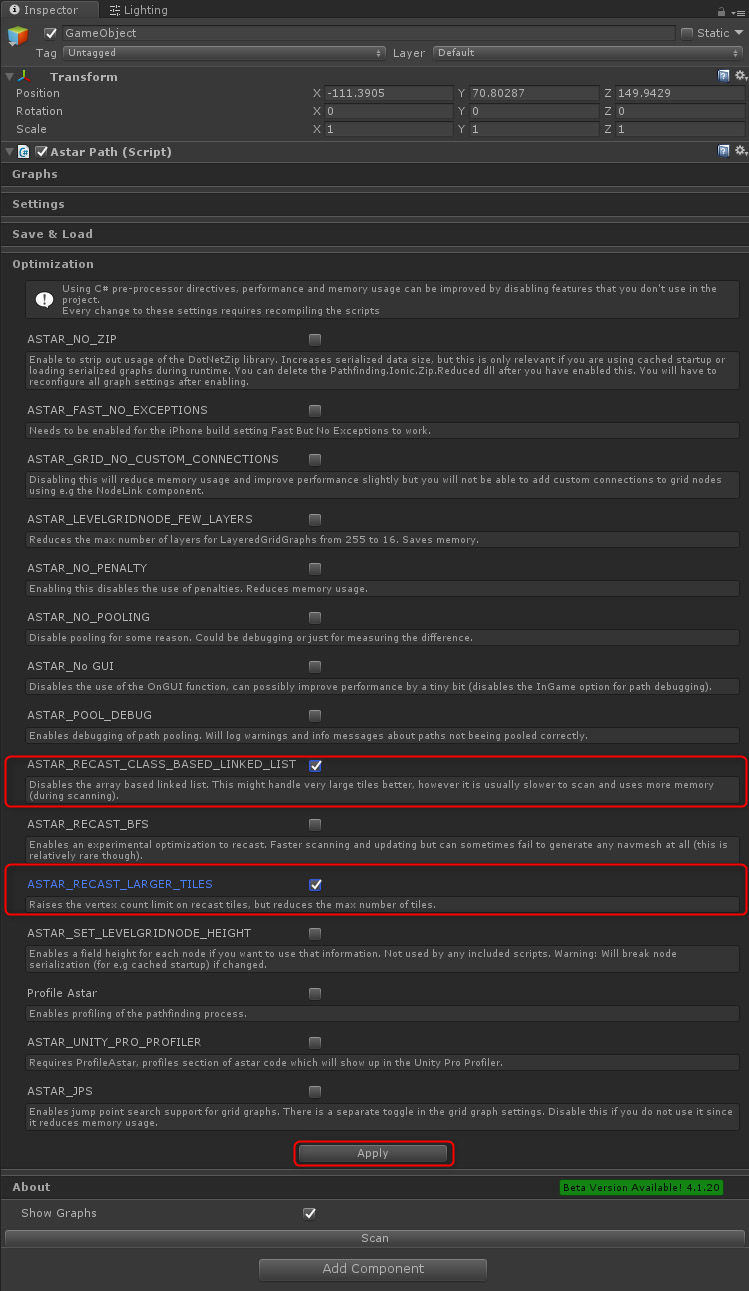
- Tick the ASTAR_RECAST_LARGER_TILES option and click the Apply button
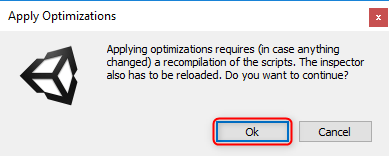
- Click the Ok button on the newly opened dialog box
- Expand Graphs tab and click Recast Graph option within Add New Graph
- Expand Recast Graph by clicking on it
- You have to set the Use Tiles to Don’t Use Tiles option, as we are using 32bit mesh
- The rest of the options are depending on your use case, but for example for the MainWorld map which is delivered within the Atavism package, parameters that worked best for us are

- Click Scan button
- The progress bar should be presented
- You can visualize it by changing options Show surface or Show outline with Show Graphs checkbox ticked

- Click Save & Load tab
- Click Save to file button
- Select the directory where you want to save it. The most important part is that name of the file must be corresponding to the Atavism instance name, for example, if you are preparing NavMesh Graph for MainWorld Instance then the file should be named as MainWorld.bytes. and click save
- In the dialog box click the Include node data button
- In the dialog, box click the Don’t scan button
- In the dialog box click the Ok button
- Then on the server-side in the directory atavism_server/navmesh/ create the new directory with Atavism Instance Name (in our case it will be MainWorld). It’s important to keep the upper and lower case corresponding with the Instance name in the Atavism Editor.
- Copy newly created graph to that created directory on the server
- Restart Atavism World Server
Important Note: Your server requirements may be varied if you are using NvMesh as each NavMesh Graph will require additional memory, and 1GB of the minimum required memory may be not sufficient if you are going to use NavMesh functionality.