Hunger, warmth and any other survival stats
Atavism 10.2.0+
For all those who have wanted hunger, warmth, and other survival stats in their games, Atavism now provides the type of stat known as Vitality Stats. These stats allow a change in the value over time (known as a shift) with actions that can be set upon reaching the minimum or maximum value (such as the player/mob dying).
For example, a hunger stat can be set with a max of 100, and a min of 0. The stat can be set to increase by 2 every 6 seconds, with death occurring when hunger reaches 100. If the player doesn’t eat some food (or have some effect applied) that decreases their hunger, they will die in 300 seconds (5 minutes).
There are 3 steps in setting up a Vitality stat: Creating the max stat, creating the vitality stat, and setting the statistic on the character template.
Creating the Max Stat
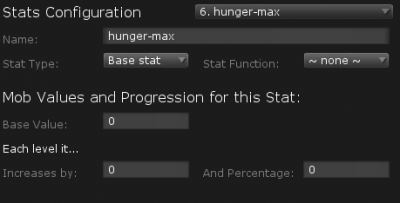
A max-stat needs to be set up to control the maximum value of the vitality stat. Open the Stat plugin in the Atavism Editor and create a new stat with the type Base Stat. I generally put the word “max” in the max-stat name to help identify it. Leave Stat Function as none and ignore the Mob Values.
Example max stat:
Creating the Vitality Stat
The vitality stat setup involves setting the shift data (how much the stat changes by itself over time), the requirements for the shift to occur, and what happens when the min/max values are reached.
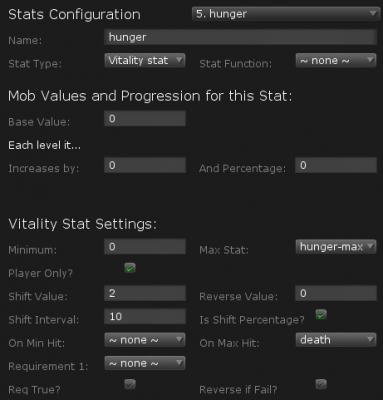
To create a vitality stat, open the stat plugin in the Atavism Editor and set its type to Vitality Stat. Set the minimum value you want (generally 0) and set the Max Stat to the stat created in the step above. If the stat should only affect players then tick the Player Only check box (most Vitality stats will be player only, otherwise you will have random mobs and NPC’s dying). Set the Shift value to how much the stat will change each update, and if the stat can be reversed (such as breath going back up when you are out of water) then set the Reverse Value. Now set the Shift Interval to how often (in seconds) you want the stat to update.
Note: Reverse mode is not functional yet and will be included in the next update.
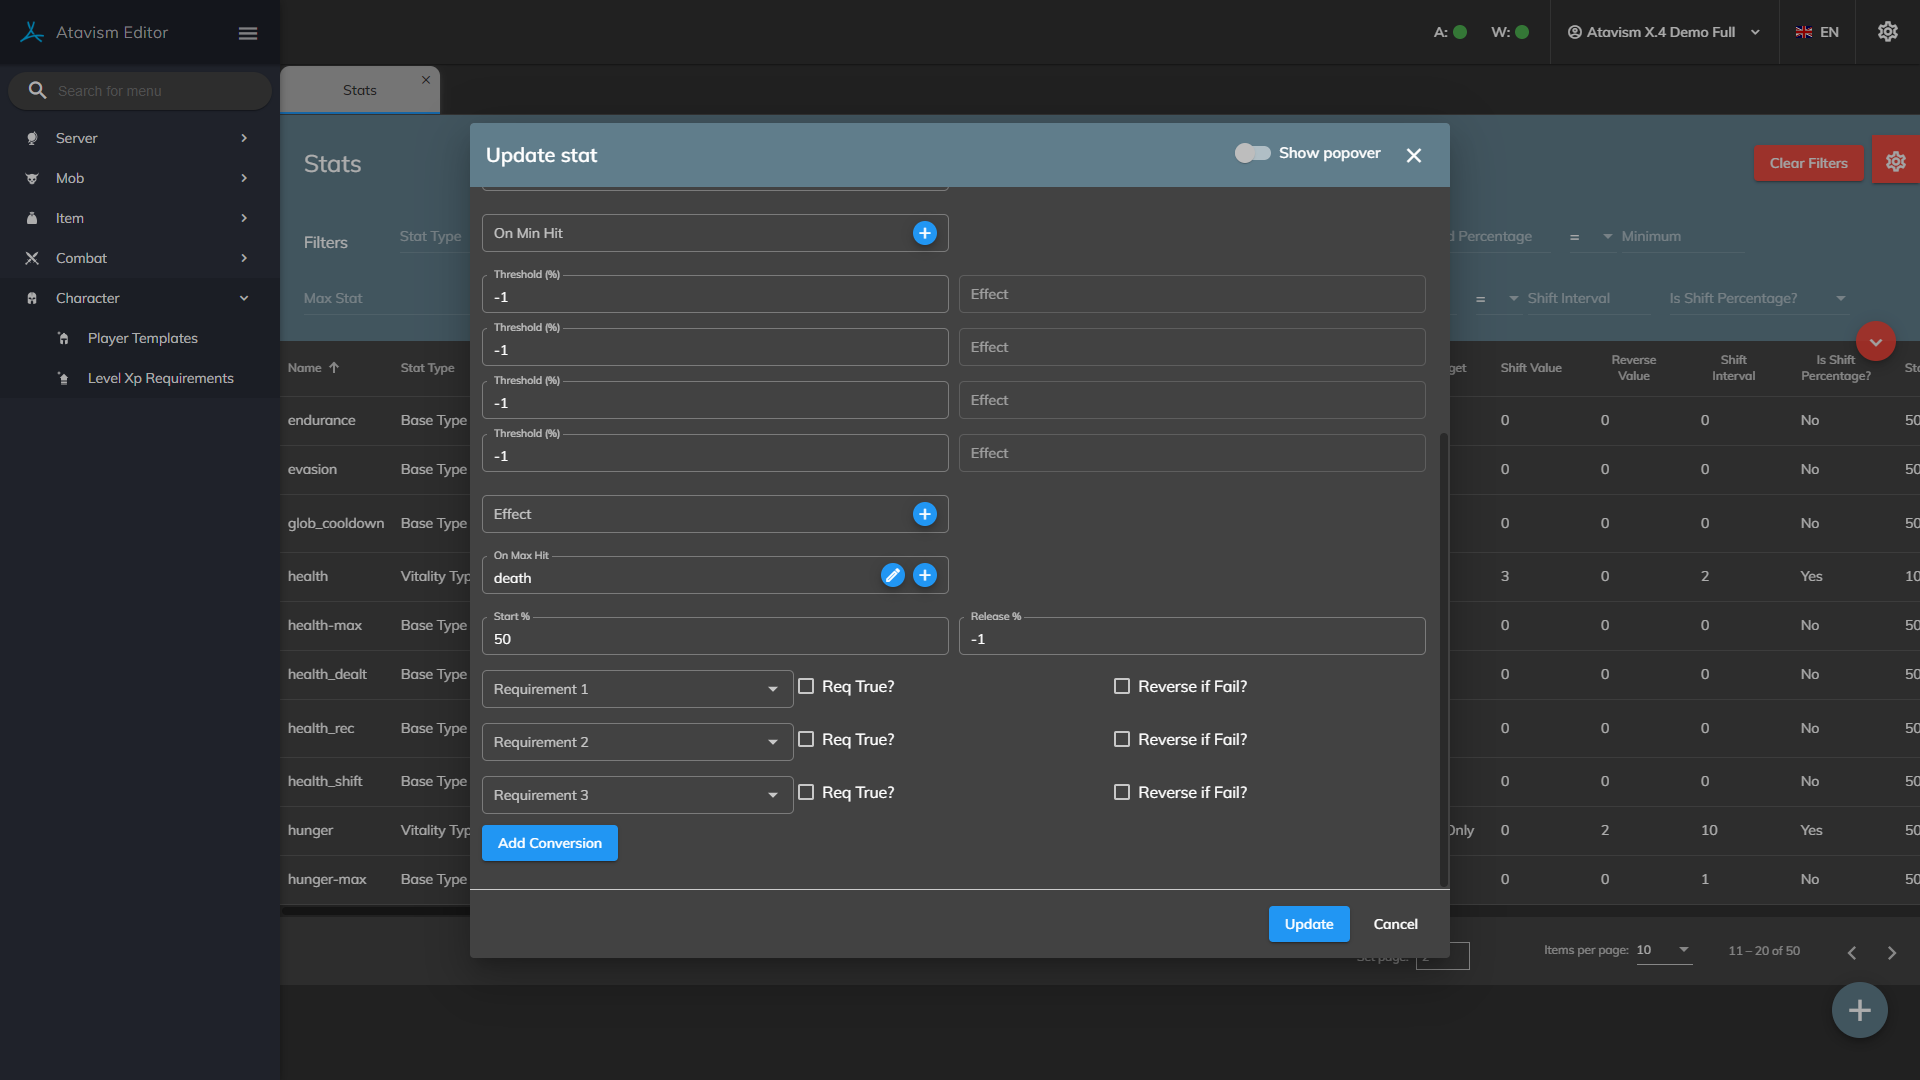
Set the On Min Hit and/or On Max Hit to what should happen when the stat reaches either its minimum or maximum. By default the only option at the moment is death. The system is designed for more options to be added in the future.
The last part of the Vitality Stat setup is the requirements. Requirements can be set so stats only update when certain states are true for the player, such as the player is alive, or not in combat. The current version provides only these two options with support for new requirements to be added in. If the stat update is to run all the time, add no requirements. Click Save Data and the only task left is setting up the stat for your character templates.
Example vitality stat:
Explanation: The hunger stat goes up by 2 every 10 seconds and when it reaches the max value (which is 100) they will die.
Setting the Stat on the Character Template
The stat now needs to be set on each character template that has been created in the Player Character Setup plugin.
Open the Player Character Setup Plugin and for each template scroll down to the new stats and set their values. Be careful when setting the base value for the vitality stat on the character as it can result in instant death (and character creation issues) if it triggers the onMin or onMax events (for example, if the onMax action is death and the starting value for the vitality stat is equal to the max value).
Example stat values on my character template:
Other ideas
From here you may want to offer ways for players to prevent their death from a vitality stat such as adding items that can be consumed that decrease the stat or giving them abilities they can activate. These ideas can be achieved using Stat Effects that modify the value of the vitality stat.
As Atavism development continues the plan is to add many new states and onMin/onMax actions to provide better gameplay. One example is the warmth that can be increased while near certain objects (fires) and decreases when outside and based on the weather. Any adventurous programmers should be able to achieve results like this already using the base that has been programmed in.
Atavism 10.1.0-
For all those who have wanted hunger, warmth, and other survival stats in their games, Atavism now provides the type of stat known as Vitality Stats. These stats allow a change in the value over time (known as a shift) with actions that can be set upon reaching the minimum or maximum value (such as the player/mob dying).
For example, a hunger stat can be set with a max of 100, and a min of 0. The stat can be set to increase by 2 every 6 seconds, with death occurring when hunger reaches 100. If the player doesn’t eat some food (or have some effect applied) that decreases their hunger, they will die in 300 seconds (5 minutes).
There are 3 steps in setting up a Vitality stat: Creating the max stat, creating the vitality stat, and setting the statistic on the character template.
Creating the Max Stat
A max-stat needs to be set up to control the maximum value of the vitality stat. Open the Stat plugin in the Atavism Editor and create a new stat with the type Base Stat. I generally put the word “max” in the max-stat name to help identify it. Leave Stat Function as none and ignore the Mob Values.
Example max stat:

Creating the Vitality Stat
The vitality stat setup involves setting the shift data (how much the stat changes by itself over time), the requirements for the shift to occur, and what happens when the min/max values are reached.
To create a vitality stat, open the stat plugin in the Atavism Editor and set its type to Vitality Stat. Set the minimum value you want (generally 0) and set the Max Stat to the stat created in the step above. If the stat should only affect players then tick the Player Only check box (most Vitality stats will be player only, otherwise you will have random mobs and NPC’s dying). Set the Shift value to how much the stat will change each update, and if the stat can be reversed (such as breath going back up when you are out of water) then set the Reverse Value. Now set the Shift Interval to how often (in seconds) you want the stat to update.
Note: Reverse mode is not functional yet and will be included in the next update.
Set the On Min Hit and/or On Max Hit to what should happen when the stat reaches either its minimum or maximum. By default the only option at the moment is death. The system is designed for more options to be added in the future.
The last part of the Vitality Stat setup is the requirements. Requirements can be set so stats only update when certain states are true for the player, such as the player is alive, or not in combat. The current version provides only these two options with support for new requirements to be added in. If the stat update is to run all the time, add no requirements. Click Save Data and the only task left is setting up the stat for your character templates.
Example vitality stat:

Explanation: The hunger stat goes up by 2 every 10 seconds and when it reaches the max value (which is 100) they will die.
Setting the Stat on the Character Template
The stat now needs to be set on each character template that has been created in the Player Character Setup plugin.
Open the Player Character Setup Plugin and for each template scroll down to the new stats and set their values. Be careful when setting the base value for the vitality stat on the character as it can result in instant death (and character creation issues) if it triggers the onMin or onMax events (for example, if the onMax action is death and the starting value for the vitality stat is equal to the max value).
Example stat values on my character template:

Other ideas
From here you may want to offer ways for players to prevent their death from a vitality stat such as adding items that can be consumed that decrease the stat or giving them abilities they can activate. These ideas can be achieved using Stat Effects that modify the value of the vitality stat.
As Atavism development continues the plan is to add many new states and onMin/onMax actions to provide better gameplay. One example is the warmth that can be increased while near certain objects (fires) and decreases when outside and based on the weather. Any adventurous programmers should be able to achieve results like this already using the base that has been programmed in.


