Resource Node Profiles
Atavism 10.6.0+

In this module, you can define various aspects of resource nodes, spawn chance, drop chance, drop items as well as many requirements for harvesting.
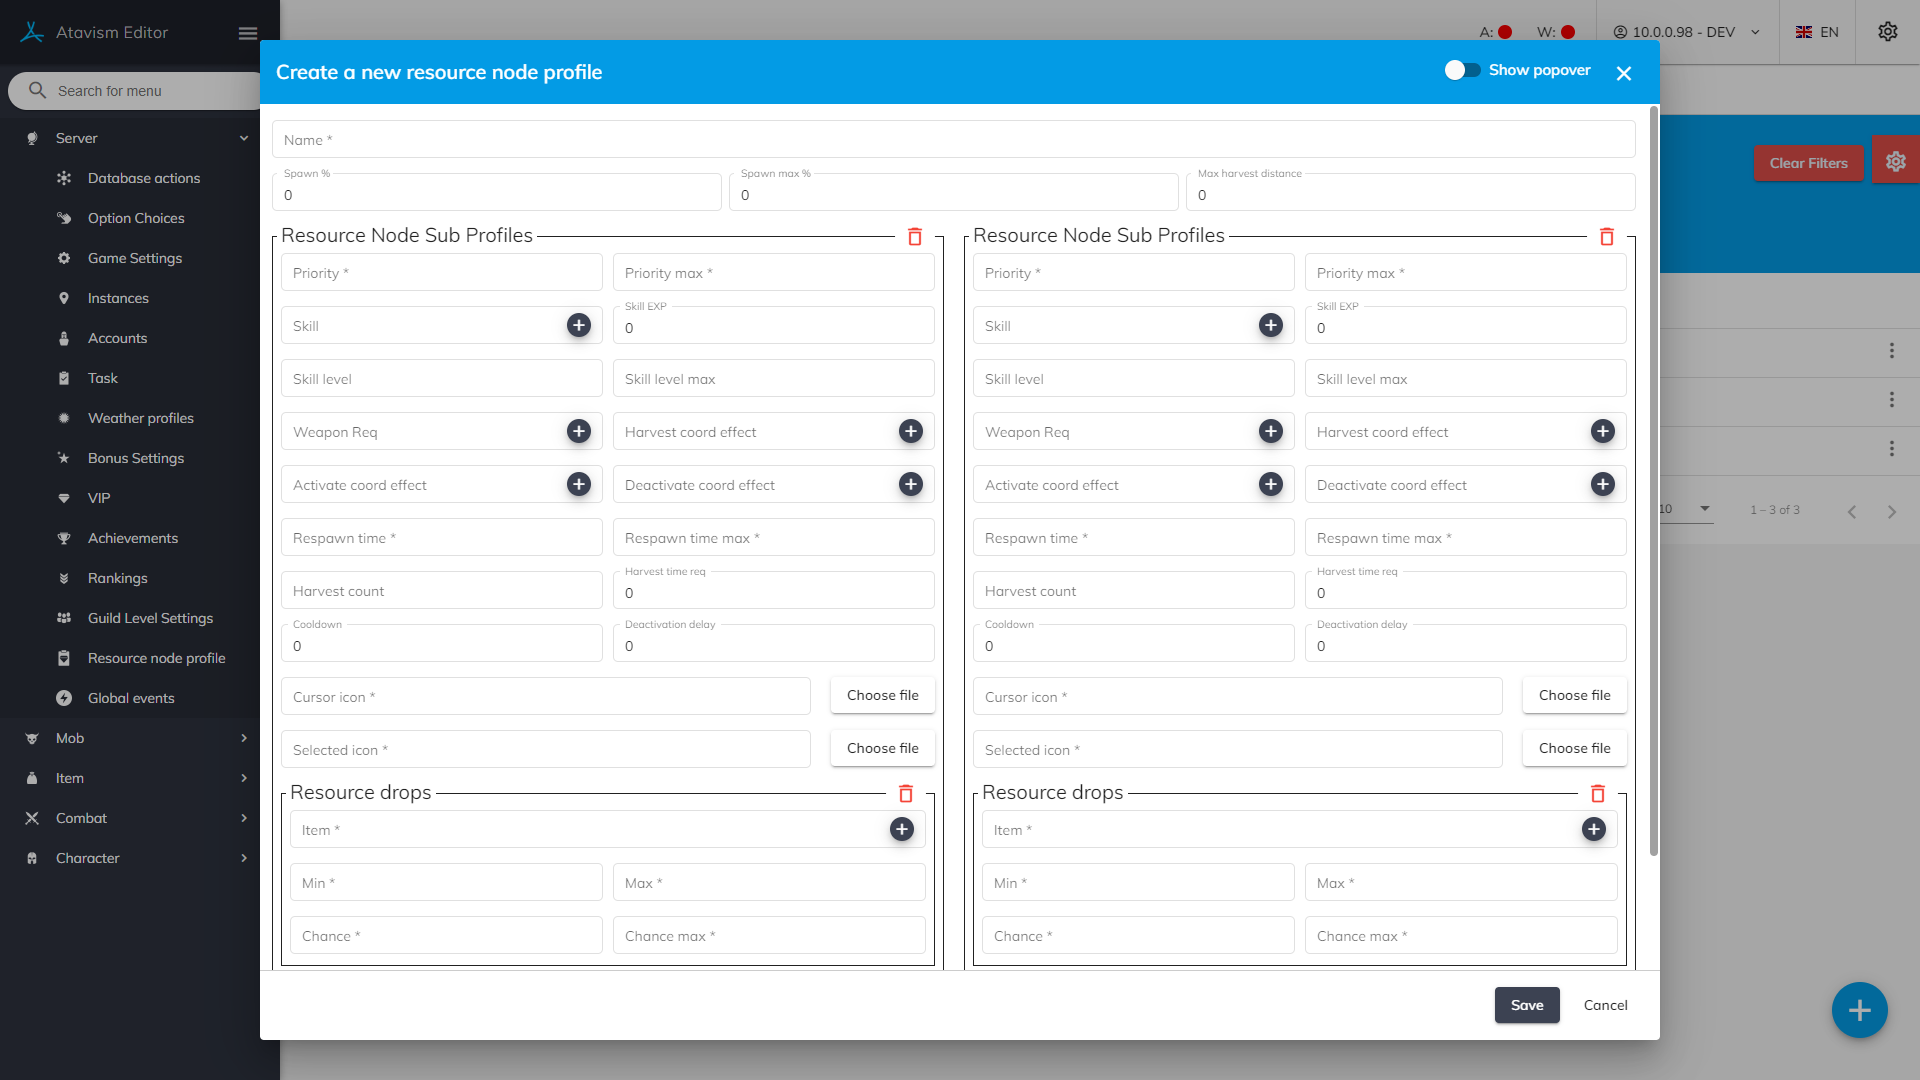
Create a new Resource Node Profile
Name: The name of the Resource Node Profile
Spawn % and Spawn Max %: Defines % range of resource nodes on the instance that has assigned this profile, so for example if you have 100 resource nodes with this profile selected in the scene, and you will set this value to 50%, then only 50 of the resource nodes will be harvestable.
Max Harvest Distance: Defines distance in meters from which the resource node will be harvestable in the world.
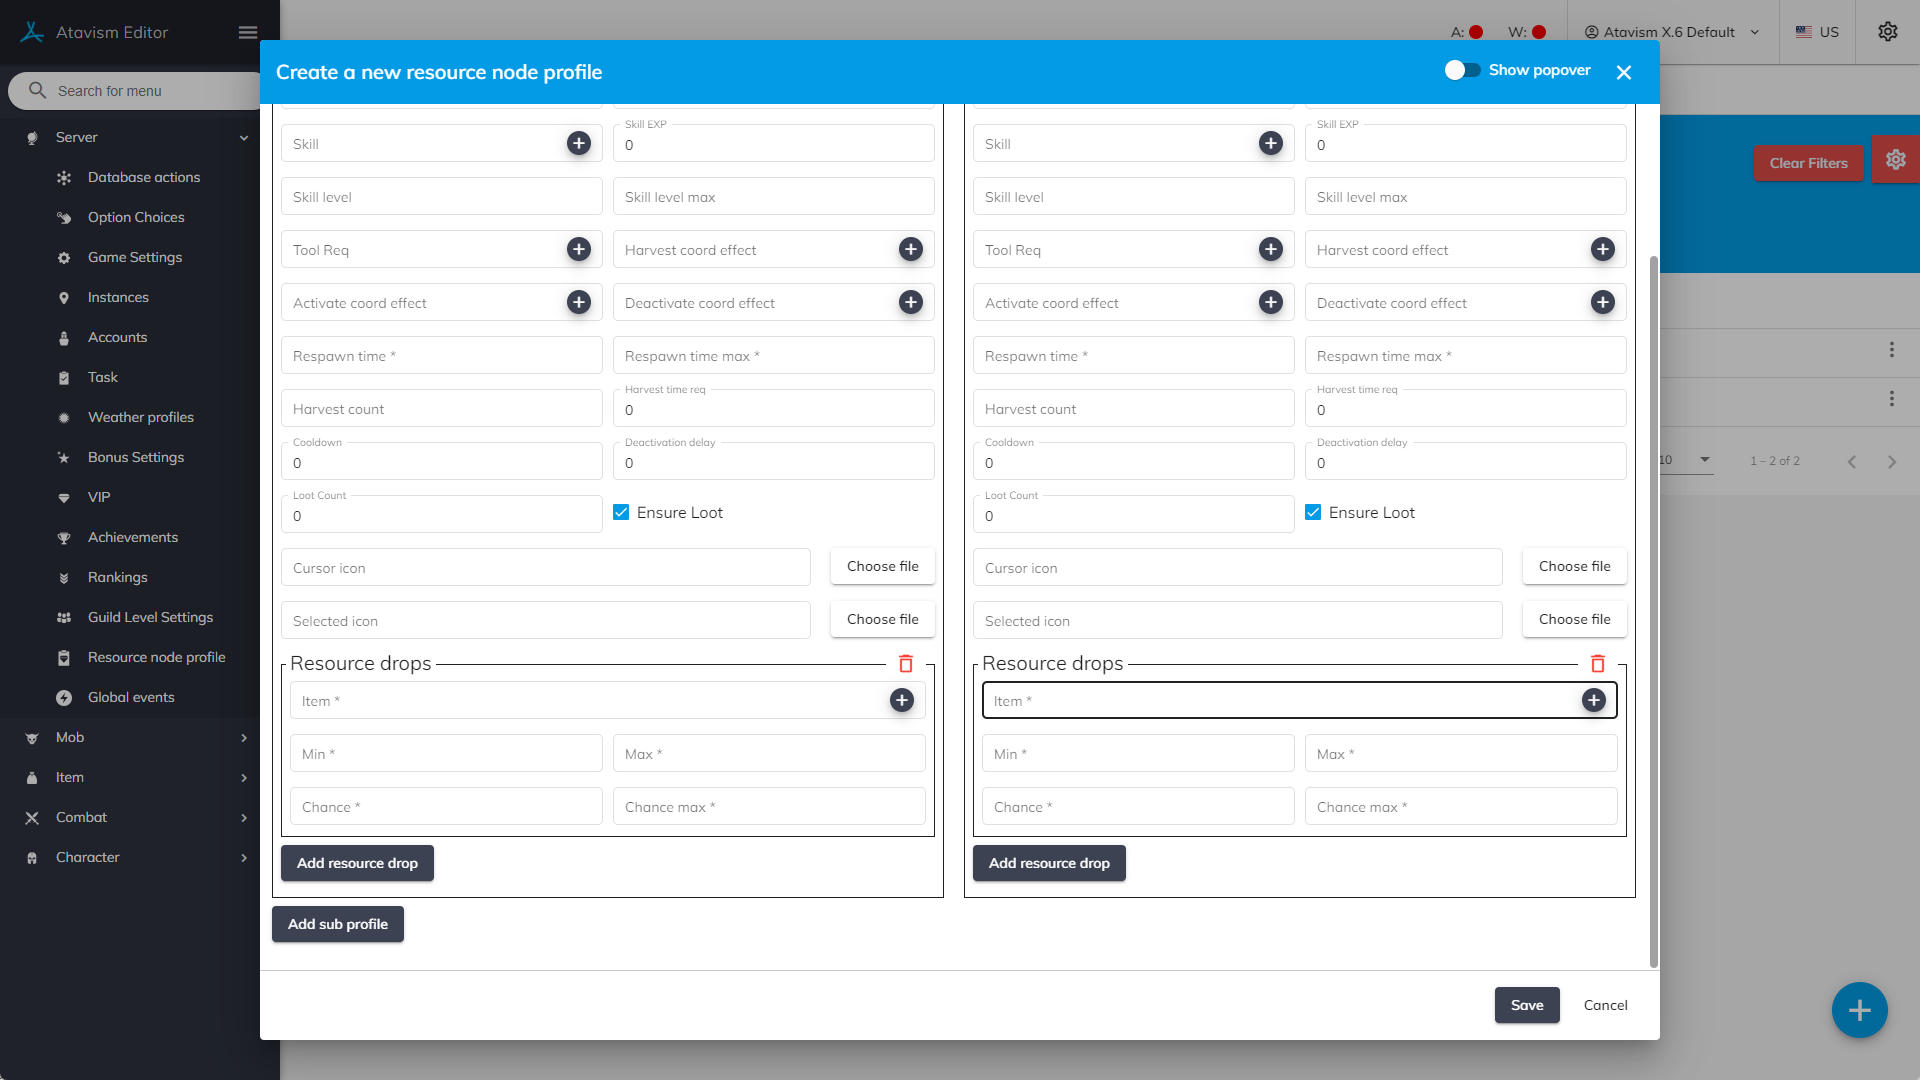
Resource Node Sub Profile
Priority – Priority max: Defines multiplier range of how often this sub-profile will be chosen. For example, you may have profile Ore with 2 Sub Profiles: Rare Ore and Normal Ore, where Normal ore will drop items like Ore, and Rare Ore will drop some Unique Ore as well as Atavism server will randomize based on the priority which Ore should be instantiated on the server Ore or Rare Ore.
Skil: Defines the required skill associated with harvesting for this resource node/sub-profile.
Skill EXP: Defines experience that will be given to the skill when this resource node/sub-profile will be harvested
Skil level – Skill level max: Defines the skill level range for which experience will be given when this resource node/sub-profile will be harvested
Tool Req: Defines the tool that will be required for harvesting this resource node
Harvest crood effect: Defines coordinated effect used during harvesting
Activate coord effect: Defines coordinated effect used when the resource node is being activated
Deactivate coord effect: Defines coordinated effect used when the resource node is being deactivated
Respawn time: Defines range in seconds after which the resource node will be respawned after it will be harvested
Harvest count: Defines the number of times the resource node can be harvested after it will be despawned/deactivated.
Harvest time req: Defines time in seconds that is required to harvest the resource node
Cooldown: Defines the number of seconds between harvesting for this resource node
Deactivation delay: Defines the number of seconds after which the resource node will be removed in the scene after the deactivation message will be received. It’s useful if you want to
Loot Count: Defines the maximum number of items that can be dropped from the resource node
Ensure Loot: Defines that if there will be no drop from the resource node due to luck, the item with the highest chance will be dropped
Cursor icon: Defines the icon that will be presented when the mouse cursor will be over the resource node
Cursor icon: Defines the icon that will be presented when the resource node will be selected
Resource Drops
Item: Defines the item which will be dropped after harvesting
Min – Max: Defines the number range of how many items will be dropped after harvesting
Chance – Chance max: Defines the percentage range for how often the item will be dropped after harvesting
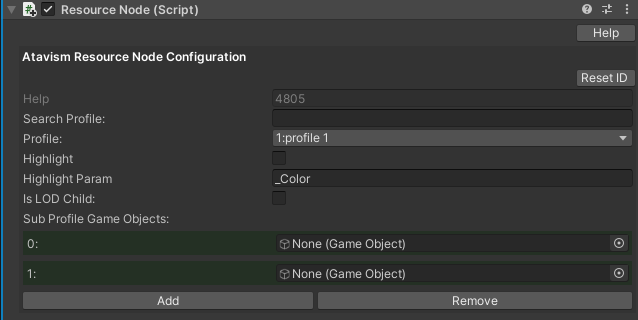
Resource Nodes configuration in the Unity Editor (Resource Node component)
After that Resource Node Profile can be selected on the scene object on the Resource Node component described in the Resource Nodes Module where you can define such parameters:
Profile: Defines Resource Node Profile created in the Atavism Standalone Editor
Highlight: Defines if the model should be highlighted when the mouse cursor will hover over it
Highlight Param: Defines shader parameter name for Highlight
is LOD Child: Defines if the resource node has a LOD Group component
Sub Profile Game Objects: Defines subobject that can be dragged from the resource node object, to create a connection between sub-profile defined in the editor and sub-profile model that will be visible in the scene
Here you can find information about how to configure Resource Nodes in Atavism.
Atavism 10.5.0
In this module, you can define various aspects of resource nodes, spawn chance, drop chance, drop items as well as many requirements for harvesting.
Create a new Resource Node Profile
Name: The name of the Resource Node Profile
Spawn % and Spawn Max %: Defines % range of resource nodes on the instance that has assigned this profile, so for example if you have 100 resource nodes with this profile selected in the scene, and you will set this value to 50%, then only 50 of the resource nodes will be harvestable.
Max Harvest Distance: Defines distance in meters from which the resource node will be harvestable in the world.
Resource Node Sub Profile
Priority – Priority max: Defines multiplier range of how often this sub-profile will be chosen. For example, you may have profile Ore with 2 Sub Profiles: Rare Ore and Normal Ore, where Normal ore will drop items like Ore, and Rare Ore will drop some Unique Ore as well as Atavism server will randomize based on the priority which Ore should be instantiated on the server Ore or Rare Ore.
Skil: Defines the required skill associated with harvesting for this resource node/sub-profile.
Skill EXP: Defines experience that will be given to the skill when this resource node/sub-profile will be harvested
Skil level – Skill level max: Defines the skill level range for which experience will be given when this resource node/sub-profile will be harvested
Tool Req: Defines the tool that will be required for harvesting this resource node
Harvest crood effect: Defines coordinated effect used during harvesting
Activate coord effect: Defines coordinated effect used when the resource node is being activated
Deactivate coord effect: Defines coordinated effect used when the resource node is being deactivated
Respawn time: Defines range in seconds after which the resource node will be respawned after it will be harvested
Harvest count: Defines the number of times the resource node can be harvested after it will be despawned/deactivated.
Harvest time req: Defines time in seconds that is required to harvest the resource node
Cooldown: Defines the number of seconds between harvesting for this resource node
Deactivation delay: Defines the number of seconds after which the resource node will be removed in the scene after the deactivation message will be received. It’s useful if you want to
Cursor icon: Defines the icon that will be presented when the mouse cursor will be over the resource node
Cursor icon: Defines the icon that will be presented when the resource node will be selected
Resource Drops
Item: Defines the item which will be dropped after harvesting
Min – Max: Defines the number range of how many items will be dropped after harvesting
Chance – Chance max: Defines the percentage range for how often the item will be dropped after harvesting
Resource Nodes configuration in the Unity Editor (Resource Node component)
After that Resource Node Profile can be selected on the scene object on the Resource Node component described in the Resource Nodes Module where you can define such parameters:
Profile: Defines Resource Node Profile created in the Atavism Standalone Editor
Highlight: Defines if the model should be highlighted when the mouse cursor will hover over it
Highlight Param: Defines shader parameter name for Highlight
is LOD Child: Defines if the resource node has a LOD Group component
Sub Profile Game Objects: Defines subobject that can be dragged from the resource node object, to create a connection between sub-profile defined in the editor and sub-profile model that will be visible in the scene
Here you can find information about how to configure Resource Nodes in Atavism.